When I was still a junior engineer figuring out how to keep our shop floor’s packaging line running, I once spent three entire nights troubleshooting a servo motor that kept dropping speed mid-cycle. I’d swapped out the driver, checked the cables a dozen times, and even reloaded the firmware, but the root turn out to be a tiny dust particle on the encoder’s sensor plate—something a basic test of the feedback loop would’ve caught in five minutes, not three straight days. That memory’s stuck with me, which is why, after 12 years as a servo motor supplier, I don’t just sell motors; I help our customers test them right the first time. Whether you’re a machine builder wrapping a new robotics arm, a maintenance tech keeping an old automation line up, or just someone new to servo drives, testing a servo motor isn’t rocket science—but it’s way more than plugging it in and hoping it works. Below, I’ll walk through the step-by-step process our team uses for every motor we ship, plus the extra checks we recommend for field repairs and new installations. Servo Motor

First, let’s get one thing straight: servo motors aren’t your basic AC induction motor. Those run at a fixed (or mostly fixed) speed, but servos are built for precision—holding a position, matching a speed setpoint, or moving exactly the distance you specify. Their brain isn’t just the motor itself; it’s the encoder that tells it where it is, and the driver that sends power and signals. So a proper servo test has to cover three core parts: the motor’s mechanical health, its electrical integrity, and the feedback system that makes it precise. Skip any of these, and you’re setting yourself up for random errors—like a robotic pick-and-place arm that misses a part by half an inch, or a packaging machine that slashes a box open too deep, costing you downtime and wasted materials.
Let’s start with pre-test preparation. You wouldn’t run a marathon without stretching, right? Same goes for servo testing. First, make sure you have the right tools. You don’t need a $10,000 lab setup—most of the tests we use daily require stuff you can find in a well-stocked automation shop: a multimeter (both analog for quick checks and digital for precise resistance measurements), an insulation resistance tester (megohmmeter), an oscilloscope (basic models work for feedback checks), a power supply that matches your motor’s rated voltage and current, and a simple mechanical mount to hold the motor still during bench tests. Also, double-check the motor’s datasheet—every servo is rated for specific voltage, current, encoder type (incremental vs. absolute), and brake strength (if it has one). Trying to test a 480V servo with a 24V supply is a fast way to break it, and we’ve seen that more times than I care to admit. Oh, and safety: always lock out/tag out power, even when you think the motor’s disconnected. Servos can hold a charge for minutes after power’s cut, especially if they have a brake.
Now, the first set of tests are bench tests—we do these before even hooking the motor up to a driver or controller, because if something’s wrong here, you don’t want to fry your control system. Start with a visual inspection, which is way simpler than it sounds. We train every new tech here to do this first: check for dents on the motor housing (a big enough dent can misalign the encoder), frayed or cut power cables (those copper strands are easy to snap if a cable’s been yanked), loose mounting bolts, and any signs of overheating—like brown or black discoloration on the motor windings, or grease leaking from the gearbox if it’s a geared servo. Last year, a customer sent us a motor they’d bought elsewhere saying it “stopped working after a week”; a quick visual check showed a frayed power cable that had been rubbing against the gearbox, cutting a strand each time the motor moved. They hadn’t even noticed it when they installed it.
Next, test the motor’s windings with a multimeter. Servo motors have three phases (U, V, W) for brushless models, which is what 99% of industrial servos are now. Set your multimeter to the ohms (Ω) setting, touch one probe to the U terminal and the other to V, then V to W, then U to W. You should get roughly the same resistance reading for each pair—within 5% of each other, per most datasheets. If one reading is way higher or lower, that’s a sign of a bad winding: maybe a broken wire, a short circuit, or a winding that’s partially damaged. Another quick check for winding shorts: set the multimeter to continuity (beep setting) and test any of the phase terminals to the motor housing metal. If it beeps, you’ve got a short to ground, and that motor won’t work—we’ve had to scrap a couple of motors at our warehouse because a wire had come loose and touched the housing during shipping, and the customer didn’t catch the bench test.
Then, insulation resistance test with a megohmmeter. This is critical for ensuring the windings are insulated from the motor housing, which prevents shocks and component damage. We use a 500V megohmmeter for most of our low- to medium-voltage servos (check your datasheet—high-voltage models might need 1000V). Disconnect all cables from the motor first, then touch one probe to the housing and the other to the combined U, V, W terminals. A good reading is at least 1 megaohm (MΩ) for new motors—if it’s below that, there’s moisture or contamination in the windings, which can cause failures once installed. I once worked with a food processing customer who stored a batch of motors in a non-climate-controlled warehouse over the winter; the insulation resistance dropped to 0.2MΩ, and the motors kept failing when they turned them on. We baked the windings at low temperature for 24 hours to drive out the moisture, and they worked like new.
Okay, now we move to the next set of bench tests: testing the feedback system, which is the brain of the servo’s precision. The encoder is what tells the motor where it is, how fast it’s moving, and whether it’s hitting the setpoint. Without a good encoder, a servo is just a fancy motor that runs at whatever speed you feed it, with no accuracy. First, you’ll need to know what type of encoder your motor has: incremental (counts pulses) or absolute (gives a unique position at power up, no homing needed). For incremental encoders, set your oscilloscope to the appropriate channel and set the motor to spin (we use a small hand crank or a variable power supply for low-speed testing). You should see three square waves (A, B, and Z for index) on the oscilloscope, out of phase by 90 degrees. That’s how the motor tells the direction of rotation—if the A wave leads B, it’s spinning forward; if B leads A, it’s reverse. If the waves are distorted, missing pulses, or not spaced correctly, the encoder is bad or misaligned. For absolute encoders, you can test it with the driver’s configuration software (most modern drivers let you connect via USB or Ethernet) to check if it’s reading unique positions as you spin the motor—if it jumps positions or doesn’t match the rotation, there’s an encoder fault.
Also, if your servo has a brake, test that too. Apply power to the brake (check the datasheet for voltage—some are 24V, some 48V) and make sure you can turn the motor shaft by hand easily. Cut power to the brake, and the shaft should lock up tight. If it doesn’t, the brake is worn out or the circuit that powers it is bad. We always include a brake test in our pre-shipping checks because a failed brake is a common cause of field failures—if a motor is supposed to hold a vertical load, a bad brake will let it drift, which can cause damage or injury.
Once the bench tests pass, it’s time for the installation test, because even a perfect motor on the bench can fail once it’s hooked up to your machine. Now, you’ll connect the motor to the driver and controller (we recommend using the exact driver/controller pair from the motor’s datasheet—mixing brands can cause compatibility issues, which is a common mistake new customers make). Start with a no-load test: power on the system, set the controller to move the motor at a slow, low-speed position (like a 10-degree rotation back and forth). Watch for vibration or unusual noise—servos should run smoothly, with no grinding or rattling. If there’s vibration, that could be misaligned mounting, a bad encoder, or even a damaged bearing in the motor. Most vibration issues on our motors are from customers over-tightening mounting bolts, which bends the motor shaft and throws the alignment off.
Next, test the speed and position accuracy, which is why you bought a servo in the first place. For speed control, set the controller to a fixed speed (say, 1000 RPM) and use a tachometer to measure the actual speed. It should be within ±0.1% of the setpoint for most standard servos—if it’s off by more, you might have a feedback calibration issue, or the encoder is reading incorrectly. For position accuracy, use a precision ruler or linear encoder (if your motor is connected to a linear axis) to measure how far the motor moves when you set it to travel a specific distance. A good servo should be within a few thousandths of an inch of the target; if it’s off, that’s a sign of a tuning issue (we help our customers with tuning all the time) or a mechanical issue like a worn gearbox.
Wait, what about field testing for motors that are already installed and failing? We get a lot of calls from customers who have a servo that’s acting up mid-production, and they need to test it without removing it from the machine. The steps are similar, but you’ll adjust for being in-situ. First, do a quick visual check of the cables and connections—loose terminal blocks are the #1 cause of field servo failures, way more than the motor itself. Then, use the driver’s diagnostic software to pull fault codes: most modern drivers will tell you if there’s an over-current, over-temperature, or encoder fault, which narrows down the problem fast. You can also use a clamp meter to test the phase current while the motor is running—if the current is uneven between phases, that’s a bad winding or a misaligned encoder.
One mistake we see all the time is skipping the homing test for servos with absolute encoders. A lot of people think because the encoder is absolute, they don’t need to home, but that’s not true—homing calibrates the motor’s position to the machine’s reference point, and without it, you’ll get position errors that cause crashes. We always include a homing test in our post-install checks, even if the datasheet says absolute encoders don’t require it.
Now, a few pro tips from our team that we don’t write in the datasheets. First, always test a servo under load if you can—bench tests are great, but a motor will act differently when it’s pushing a load. If you’re testing a motor for a robotics arm, hook it up to a lightweight arm and move it through its full range of motion, not just spin it free. Second, don’t ignore temperature checks—after running the motor for 30 minutes at full load, touch the housing (or use a temperature gun); it should be warm, not hot enough that you can’t hold it for more than two seconds. Overheating is a sign of bad bearings, insufficient cooling, or an electrical fault. Third, if you’re testing a used servo (like a refurbished unit or a motor from a surplus parts bin), add a continuity test for the encoder cables—we’ve had more than one customer get a surplus motor with a cut encoder cable that looked fine on bench winding tests, but failed when connected.
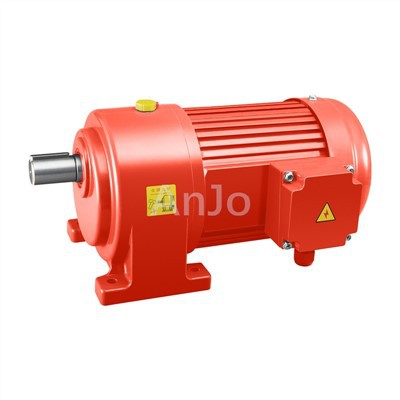
At the end of the day, testing a servo motor is about matching precision to your application’s needs. A servo for a small desktop 3D printer doesn’t need the same rigorous testing as a servo for a automotive assembly line, but the core steps apply every time. Over the years, we’ve learned that the best customers are the ones who test their motors properly—they have less downtime, fewer callbacks, and trust that the servos they buy from us will do exactly what they’re supposed to. If you’re working on a new project, troubleshooting a failing motor, or just want to make sure your current setup is running at peak performance, our team is here to walk you through every step. We don’t just sell servo motors—we partner with our customers to make sure their automation runs smoothly, and we can help you pick the right motor, walk you through testing, or troubleshoot any issues that come up. Reach out to start a conversation about your specific needs, no obligation.
Stainless Gearbox References
- Industrial Servo Motor Theory and Application Manual. Automation Federation, 2021.
- NEMA Standards for Servo Motor Testing Procedures. National Electrical Manufacturers Association, 2019.
- “Encoder Testing and Calibration for Motion Control Systems.” Motion Control Engineering Journal, vol. 18, no. 2, 2022, pp. 45-52.
Hangzhou ANG Drive Co., Ltd.
As one of the most professional servo motor manufacturers and suppliers in China, we’re featured by quality products and good service. Please rest assured to wholesale custom made servo motor from our factory. Good service and quality products are available.
Address: No.185, Jincheng Rd., Hangzhou 311202, China
E-mail: export2@angdrive.com
WebSite: https://www.anjodrive.com/
